
Swatching. The task that keeps us from casting on our knitting projects right away. But, whether you like it or not, swatching is essential – especially if you’re knitting a garment that needs to fit correctly.
I can’t tell you the number of times I have heard knitters say that they don’t need to swatch because they always get gauge with the recommended needle size. As much as we’d love this to be the case, it rarely happens.
A knitting pattern‘s gauge is determined by the designer (not a universal standard) and since everyone, including designers, knits differently, getting gauge with the recommended needle size is hit and miss. If your gauge is off, your project will not match the pattern’s finished measurements and you may not be happy with the fit.
For that reason, we recommend that you always swatch for your projects. You might even learn to love it!
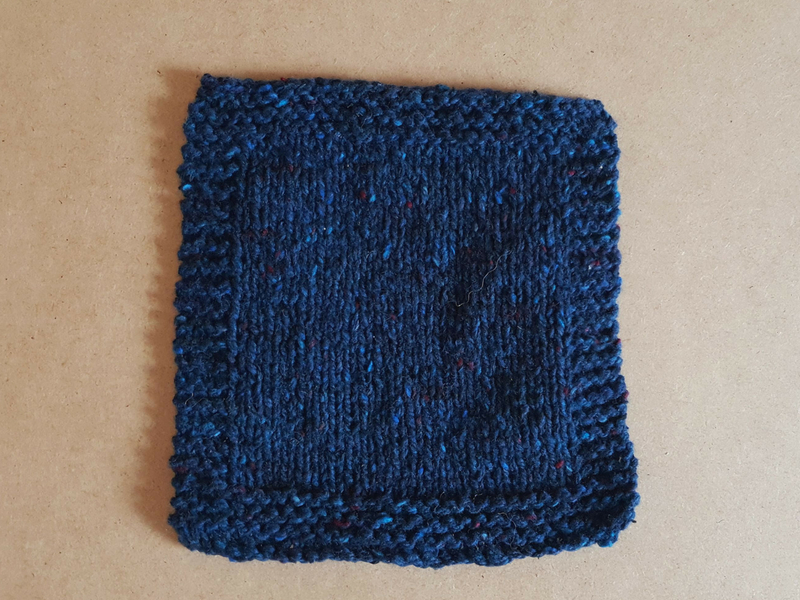
This swatch is 7″ square and has been knitted flat with garter edges. Yarn: Arranmore Light in Meara.
Swatch Knitting Tips
Use the Same Yarn and Needles
It probably goes without saying, but in order to measure your gauge, you must make the swatch using the same yarn and needles that you intend to use for the project.
Go Big or Go Home
Many knitters make their swatches too small, leading to inaccurate gauge readings. In order to measure your knitting tension correctly, you should try to make your swatches 6-8″ square.
You should also accommodate for uneven stitches at the edges of your swatch by using a 4-stitch garter edging on either side and 6 rows of garter stitch at the top and bottom.
An easy way to calculate the number of stitches to cast on for your swatch is to take the number of stitches per 10cm/4″ recommended in the pattern and multiply it by 1.5. You might want to play around with this number to accommodate a stitch pattern repeat. Then add 8 stitches to that number for the garter edging.
E.g. If my pattern wants me to get 22 sts and 28 rows per 10cm/4″, then I would multiply 22 by 1.5 to get 33. I would round that up to 34 because I like even numbers. Then I would add 8 sts for the edging to give me a final cast on of 42. This might seem like a lot, but a larger swatch like this will give you a far more accurate gauge reading.
We list all our patterns at different skill levels on our website such as beginner, advanced beginner, intermediate and advanced. You can browse all our patterns here and find a skill level suited to you.
Block your Swatch
We all know that blocking does wonders for any handknit, but do you block your swatches? Blocking your swatch before you measure the gauge will allow for any shrinkage.
If you are planning to stretch block your project, you should do the same with your swatch by pinning it out to dry. Otherwise, leave your swatch in its relaxed, unpinned, state to dry. It won’t look as neat and straight as a pinned out swatch, but you will get a more accurate reading.
Knit Flat or in the Round, Depending on the Pattern
Most knitters will find that their gauge in the round differs from their gauge when knitting flat. This is because some people’s purl stitches are a little looser than their knit stitches. If your project is knitted in the round, don’t knit a flat gauge swatch – it’s not accurate enough. Instead, follow our simple method below for knitting your swatches in the round.
This is how the back of a swatch looks when it is knitted in the round. It’s a bit messy, but once it is trimmed and blocked, it is very easy to measure gauge from. Yarn: Luma in Ancient Stone.

How to Knit a Gauge Swatch in the Round
- Cast on your required number of stitches using a circular needle and work the first row.
- Without turning your work, slide the stitches (with the RS facing you) to the other end of the needle.
- Your yarn will be attached to the last stitch on your needle, so carry it loosely behind the swatch and work row 2.
- Repeat steps 2 and 3 until you have completed the swatch.
You will have lots of (messy) loops at the back of your swatch, but that’s not a problem. Tighten up the edge stitches as you go along by tugging on the loops. Once you have bound off, snip the loops at the back of the work and tighten them up a final time before blocking.
Using this method, you will get an accurate swatch of your gauge when knitting in the round.
In order to take an accurate gauge measurement, this swatch has been knitted in the round, carrying the yarn at the back of the work. Yarn: Lore in Heaven

How to Calculate Your Knitting Gauge
To measure your stitch gauge, place a pin in the stitch next to the edging of your swatch. Then, measure 10cm/4″ across from the pin and place another pin, making sure to stay within the horizontal line of stitches. Count the number of stitches between the two pins and make a note of it somewhere.
To measure your row gauge, do the same thing vertically.
Do not ignore partial stitches/rows within that 10cm/4″ section – even half stitches/rows should be included. Across the entire project, they add up to a significant measurement.
How to Measure Gauge across Complex Stitch Patterns
Measuring gauge across complex stitch patterns such as lace or heavy cables can be tough. In cases like this, we use a different method.
Using the pattern or chart, find out how many stitches are in a single pattern repeat and note it down. Then, place a pin either side of the pattern repeat and measure it, noting down the measurement.
Now for some maths:
Take the number of stitches within a repeat and multiply it by 10. Then, divide that number by the width of the pattern repeat in cm. Round that number to the nearest .5 to get the number of stitches per 10cm/4″.
E.g. If I had 11 stitches in my pattern repeat and multiply it by 10, I would get 110. My pattern repeat is 5 cm wide, so I would divide 110 by 5 to get 22. This is the number of stitches per 10cm/4″ in my gauge swatch.
You can use the same method, vertically, to calculate your row gauge.
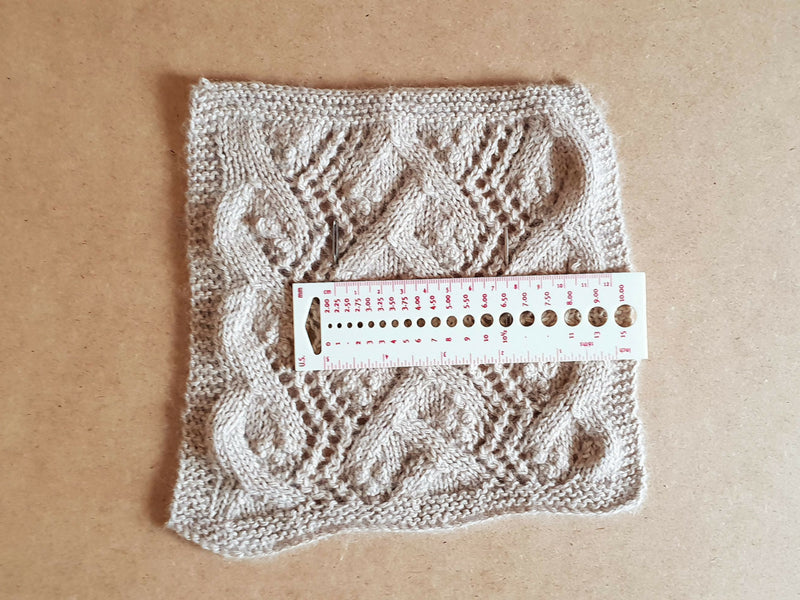
Because the stitch pattern is quite complex, we have measured the width of the pattern repeat to find out the number of stitches per 10cm/4″. Yarn: Road to China Light in Riverstone
Knitting Gauge Problems
If you measure your gauge swatch and it matches the recommended gauge for stitches and rows, congratulations! You are now ready to cast on. If not, it’s time to start swatching again.
Here’s what to do if your swatch doesn’t meet the recommended gauge…
Q. Why is my sample swatch too small?
If you have too many stitches per 10cm/4″, this means that your stitches are too small. Go up a needle size and make a new swatch.
Q. Why is my sample swatch too big?
If you don’t have enough stitches per 10cm/4″, this means that your stitches are too large. Go down a needle size and make a new swatch.
Q. Why can’t I get row gauge?
Many knitters struggle to get row gauge, even when they get the correct stitch gauge. If you are having this problem, you could try and knit with a different type of needle in the same size. E.g. if you made your first swatch was knitted on metal needles, try this one using wooden needles. A change in needle material can sometimes help with row gauge.
If you’ve tried everything and still can’t get row gauge, there are two options:
- If the pattern gives you instructions based on length measurements and not rows, you could cast on and knit until you meet the required length
- If rows are very important in the construction of the pattern, it might be best to find an alternative yarn or pattern
Get Swatching!
With the right mindset, swatching can be very enjoyable! This is your opportunity to explore the yarn, see how it knits up and test out the stitch pattern. Rather than seeing it as something that delays the fun of casting on a new project, see it as a way of ensuring that your project is going to come out just how you wanted it to.
We hope this blog post clears up any questions or confusion you have about swatching. If you do have any further questions, we welcome you to ask them in the comments section below – we would be very happy to help you!
Ready to Learn More?
You can find great content on many aspects of knitting on our website blog, such as the following knitting tutorials:
- The Fibre Co. Tutorial Series – Learn about casting on, cabling and finishing
- How to Adjust a Knitting Pattern When You’re Between Sizes – We show you how simply adjusting your gauge can help you to achieve the correct size for your body
- How to Alternate Skeins – Noticing your fabric is colour-blocking or pooling in unexpected ways? This blog post will help!
- How to Cable Without a Cable Needle (with videos!) – A fantastic easy-to-view video series that helps you cable, without a cable needle!
- How to Mend Holes in Your Handknits – We look at the mending toolkit, the right time to mend, and the methods involved